Thursday, April 23, 2015

Ribs Ribs Ribs!

Exodus 12:9a "Do not eat the meat raw or boiled in water, but roast it over a fire..."

Well, there you have it, even God says you shouldn't boil your ribs. If you do, you're probably maybe facing eternal judgement, but don't sweat it, this recipe will show you the right way to make ribs that fall apart and taste like they came straight from heaven's kitchen... or grill.

I need to give a precursor, this is an abridged form of the Last Meal Ribs from amazingribs.com I've found their rib recipe to be the best and this site is just a compilation of recipes I find worthy of my stamp of excellence, I don't claim responsibility for birthing this recipe.

What you're gonna need
  • Ribs, either baby back or St. Louis are preferred, but you can use spare ribs if necessary
  • 3/4 cup firmly packed dark brown sugar
  • 3/4 cup white sugar
  • 1/2 cup paprika
  • 1/4 cup garlic powder
  • 2 tablespoon black pepper
  • 2 tablespoon ground ginger powder
  • 2 tablespoon onion powder
  • 2 teaspoons rosemary powder
  • salt
  • apple pellets
Step One: Preparing the Meat

So this is a part a lot of people don't understand. Most figure, "I just gotta buy the meat and throw it on the grill. It'll taste great." While they may be edible if you do that, your experience eating the ribs won't be nearly as good as that slab of meat and bones deserves. 

First stage of the meat prep is rinsing it off with water and then quickly padding it dry with a paper towel. 


After you've done that, you're gonna need to remove the membrane from the back of the ribs. The reason for this is that it becomes hard and leathery while cooking, making eating the ribs a less tasty, and much more challenging experience than it needs to be. 

To remove the membrane, just slide a butter knife under it, then grab it and pull. Depending on the ribs, it will all come off in one piece. I find spare ribs are much much harder to work with as far as removing the membrane goes, but it's necessary to allow the meat to cook correctly and to keep it edible with nothing more than fingers. 

Membrane is mostly removed here
Step Two: Seasoning

I unfortunately forgot to take a picture of this stage, so I'll put one up of the meat on the grill. 
So for the seasoning, you're gonna use kosher salt or a salt grinder over both sides of the ribs, you don't need to put a whole lot on, just what you would normally do if you were seasoning meat you were about to eat. 

Now let this sit for an hour or so in the fridge, the salt helps to tenderize the meat and bring out flavor. While that's sitting, mix all the other seasonings together. It will be more than you need for just a couple racks. After the hour is up, pull the ribs out of the fridge and cover them in the mix. It doesn't need to be an overly thick coating and the ribs should show through. 

Step Three: Smoke

Turn your grill on to smoke, and leave them be for an hour. 

Step Four: Turn Up The Heat

Now it's time to actually cook your ribs, turn it up to 225° and let them cook for about 5 or 6 hours, 4 if they're baby back. Once that time is up, baste them in your favorite BBQ Sauce. As always, I exclusively recommend OMG BBQ.


Now turn it up to 450 and let it cook the sauce on the ribs. It will take a few minutes, don't let the sauce burn. 

Step Five: Remove The Masterpiece From The Grill


Step Six: Eat

These ribs will pretty much fall apart, and they are probably the best ribs you've ever eaten. So Enjoy, brag, and make about twice as much as you think you'll need because there won't be leftovers no matter how much you make. 

The pink is called a smoke ring, and it's why they taste so damn good.
Notes and Afterthoughts

Many people, especially those in competition circuits do something called a "Texas Crutch." It's basically wrapping them in foil with a little bit of water to make them more tender. I intentionally don't do this for two reasons. One; I'm lazy and don't want the extra step. Two; this is the real reason. When you do the Texas Crutch, it softens the bark on the meat, which I think is actually a negative as that adds a lot of flavor and a great texture. 


#HardwoodsOnly

Saturday, April 4, 2015

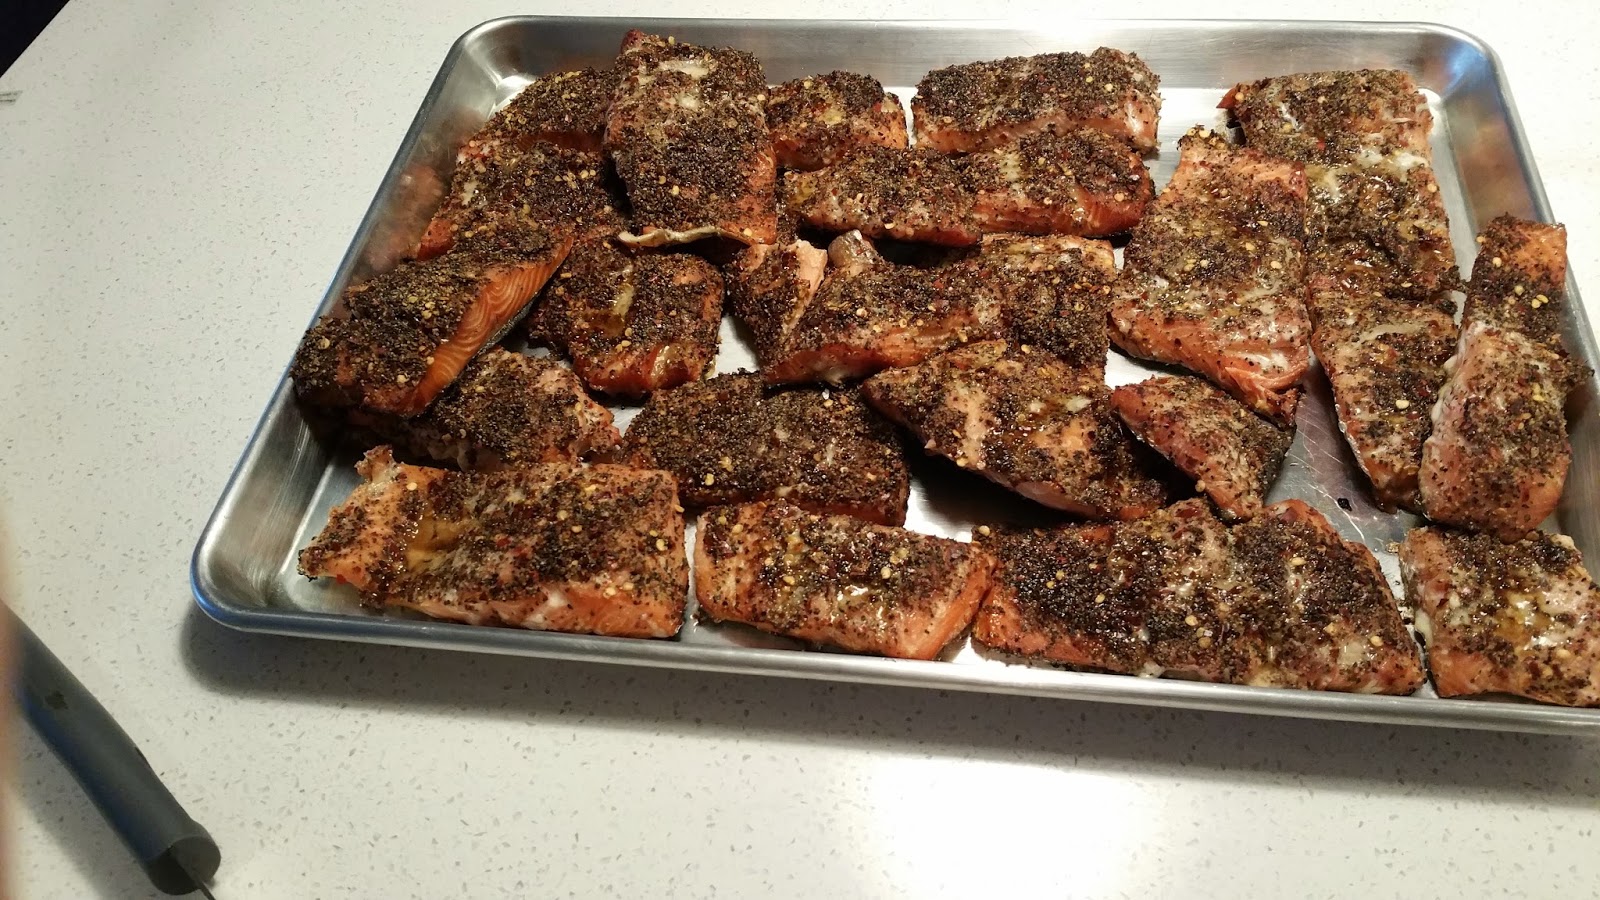
Smoked, Peppered Salmon: Fish To Fight Over (Monk Original Recipe)

After searching for a good smoked salmon recipe, I finally gave up and made my own. 
So I love salmon. Especially the smoked variety. I've tried a lot of amazing smoked fish in my life, but I was always looking for a combination of flavors that never really seemed to do it for me. Finally, after getting bored of trying other's recipes I decided to just make my own recipe with my favorite simple brine. So let's dive in and make some fish

What you're gonna need
  • Salmon fillets 2-5lbs
  • a big bowl of water
  • 2 1/2 cups kosher salt
  • 1 1/2 cups brown sugar
  • Apple Pellets

For the seasoning
Note: this will be relatively spicy depending on your tolerance, also it will need to be doubled or tripled if you're making a lot like I do in the tutorial. For this I tripled it and made 2 whole wild caught Coho Salmon which I filleted myself (which is why they're ugly, I've got no clue what I'm doing when it comes to cutting up fish)
  • 2tbsp black pepper
  • 1tsp brown sugar
  • 1tbsp crushed red pepper
  • 1 tsp garlic powder
Step One: The Brine
Mix the water, 2 1/2 cups kosher salt, 1 1/2 cups brown sugar in a bowl. Mix it until all the sugar and salt dissolve. This will only take a couple minutes of stirring. Doesn't need to be perfect. Then cut the salmon into 3 inch strips, add it to the bowl, and refrigerate for 3-4 hours.
Step Two: Mix The Seasoning In A Ziplock Bag

Step Three: Smoking The Flavor In
For this, we use Apple pellets. Turn the grill to smoke, put the fish on it, skin down, and generously coat the top of the fish with the seasoning. Then close the lid and let her smoke for an hour

Step Four: Turn It Up And Take It Off
This step isn't exactly challenging... turn it up to 180° and let it go another hour then take it off

Step Five: Refrigerate... Or Throw Self Control Out The Window And Eat It Hot
Personally, I prefer it cold. However, it does taste excellent hot. I could eat this stuff all day. It's like candy. I advise letting it cool to reduce the condensation produces then stick it into a gallon sized ziplock bag or some air tight Tupperware. 

Final Thoughts:
I've had a few people tell me this recipe has too much pepper, and others tell me it's the best smoked salmon they've had in their life. It really depends on personal preference. I was shooting for a very specific taste when I created this and I think that I hit it right on the head. If you prefer a less peppery/spicy recipe, I would advise dropping the pepper to half and maintaining the same quantities for the other ingredients. 

Something else; you may read this and say "Hey, he's cooking it at 180°... that isn't smoking. When you smoke something, you don't cook it." Well that would be correct and incorrect. There's two types of smoking, cold and hot. Cold smoking is what you do for things like beef jerky. I will never advise anyone try this with fish at home. There are commercial facilities designed for it with very stringent codes that they need to adhere to. You have very high risk of food poisoning if you try cold smoking fish at home. That's why we do it at 180°. It's fully cooked, but it's also smoked... and trust me, it's absolutely delicious. 

#HardwoodsOnly

Friday, April 3, 2015

Perfect Pulled Pork (A Monk's BBQ Original)

Delicious, cheap, and so easy I can do it in my sleep (no, seriously). 
Pulled pork makes for a great meal for large groups (or, in my case, lunch for a week or two from cooking once). If you make it right, it tastes great. It's dirt cheap and can often be found for $1.30/lb. The best part is that it's super simple to make, given you've got a pellet grill. So let's get down to it.

What You Need

  • Pork Butt (also called picnic cut, boston butt, etc...) roughly 10lbs
  • 1/2 cup kosher salt
  • 2tbsp pepper
  • 1tbsp chilli pepper
  • 1tbsp paprika
  • 2tbsp Cumin
  • 1tbsp curry powder
  • Jack Daniels or your favorite bourbon
  • Apple Pellets
(I also advise building a hopper extension like the one HERE)

Step One: Mix the seasoning in a bag

Step Two: put the meat fat side up on a pan, and coat it thickly in the seasoning
Really rub the seasoning into the meat. It will help the flavors soak in.
 

Step Three: Refrigerate overnight
There should be no instruction necessary here. If you can't figure this one out, perhaps request that your wife take over all kitchen duties to cover your incompetence

Step Four: Drop it on the grill
Get your grill going and set it to 225° then let it go... for about 10 hours

Step Five: Inject your Jack or Bourbon (can be done as soon as it's on the grill)
Do this in multiple locations and be generous. The flavor will be better dispersed that way. Using straight Jack or Bourbon is best in my opinion. Other people use apple juice or a 50/50 mix... I think they're wrong. I've tried that and frankly I like my meat tasting like meat, not like a child's lunchbox

Step Six: Temperature and taking it off the grill
So you need an instant read DIGITAL thermometer. I'll have a post about the good ones soon. Ideally you want the meat to be 197-203° when you remove it from the grill. Personally I aim for 201-203° because this is the point at which it's most tender. It will literally fall apart while being picked up. 
Note; it shrinks a lot while cooking

Step Seven: Pull it. 
So for this step there are a few different ways you can do it. You can use bearclaws, which work very well. Personally, I'm lazy. I use a Kitchenaid stand mixer with the bread hook attachment, this makes quick work of it and saves you having to do it manually

Final Step: Put it on a bun, throw some of your favorite BBQ sauce on it and enjoy.

Other thoughts
So at the beginning I said I could make this in my sleep... I wasn't lying. The photos of this particular batch (I make this stuff pretty regularly) are of meat that was cooked overnight. I created that hopper extension for the specific purpose of being able to put it on the grill and not worry about it running out all night. I exclusively recommend using OMG Barbecue sauce with it. This is the best pulled pork I've encountered. It's a recipe I made personally based off my limited knowledge of meats and seasonings. My Aunt has been a huge help and influence in this knowledge as well as a tremendous amount of research I've done all across the web. Enjoy and as always...

#HardwoodsOnly

Thursday, April 2, 2015

Pointing Out The Obvious: A Collection Of Helpful Tricks And Ideas

Hey readers, this is my "why didn't I think of that?" section of my blog. Useful things I've discovered along the way will be posted here. I'll periodically be updating this blog with things that are obvious after you've seen them.

The Hopper Extension
So you're cooking something that needs to go for ten or twelve hours and you have other things to do apart from stirring and adding pellets? Try making one of these. I just took a 4' 12x1 and cut it into pieces. 4 walls, 2 lips to hold it even/in place. The result is the ability to fill my hopper and its new extenstion, then go to bed while my pulled pork cooks (first try, hope this goes well). Don't worry about it catching on fire, a well made pellet grill lets very little heat out and the open lid of the hopper will shield it from the majority of the heat that would get out.


#HardwoodsOnly

Wednesday, April 1, 2015

Steak, The Only Thing Women Love More Than Chocolate

They say the way to a man's heart is through his stomach. That very well may be true, but a woman can't resist a man who can make the perfect steak. And that, ladies and gentlemen, is what I plan to teach you to do.

What you'll need


  • Steaks 1.5-2" thick Ribeye is best. The thickness is essential. You'll need to ask the butcher to cut it because this isn't a thickness most stores carry. I think Costco is an exception. If you can, it's best to buy the meat day of so it's fresh. All of the high end steak places use this thickness. The reason is that thinner steaks tend to be well done by the time that they're properly browned. There are ways to do it, but I'm not gonna go over that right now. 
  • Kosher Salt
  • Pepper
  • Garlic
  • A Stick of Butter
  • A tbsp of Olive Oil
  • fresh chives
  • fresh parsley 
  • Oak Pellets 
Step One
Mix all the seasonings. You mix them first because otherwise you create layers of seasoning and not everything penetrates into the meat evenly. Use a LOT of salt. Trust me on this. Add in pepper and garlic powder to taste. Coat all sides evenly. Then let sit and come up to room temperature. The reason for this is that when meat is cold, it cooks and warms at the same time, creating a gradient going from well done on the outside to potentially what you're aiming for in the center. When you let it come to room temp first you can sear the outside and leave everything rare or medium rare as it should be. 


Step Two
Fire up your grill, I advise using Oak, but if you prefer, Apple is also excellent. If you're using a pellet grill, just leave it on smoke. Drop the steaks on it and let it smoke them for an hour. 

Step Three - Butter
While the meat is smoking, take the stick of butter, get it soft, chop up some chives and some parsley (about 1tbsp each) and add the olive oil. Then throw them in a bowl and use an electric mixer to whip the butter and get the herbs mixed in.


Step Four 
Throw the butter on a piece of plastic wrap then roll it up. Should look like a white, vegetable spotted turd

Step Five
When the steaks are done smoking, take them off, throw them on a plate, put a cast iron skillet or pan on the grill and turn it to max. Wait for it to get up to 450°. While you're waiting for that to heat up, use a brush to put vegetable oil on both sides of the steak. Once it's up to heat, throw the steaks on and close it. 

Step Six
Four minutes on each side will make it rare or medium-rare. Remember that if it isn't cooked enough for your taste, you can always put it back on, but if it's over cooked, you can't uncook it. I'd say, with a good cut of meat, you should NEVER make it any more done than medium. Once that's done, pull it off and put the herb filled butter on it then let it sit for 5 minutes (covered in foil to retain heat) before serving


Last Step
Eat, melt the heart of that girl you love so much. Prove you are, in fact, the king of the grill and the steak. Then realize you've spent $100 on a steak at a restaurant that wasn't half as good as what you just made for $12. 

Final notes
Notice in the last photo how it's seared on the outside, but the same color all the way through? This whole process is called a reverse sear and there's a reason we do it like this. You see, most high end steak places have this process where they first sear it in a cast iron skillet, then put it in the oven. That's great, and it's a very efficient way to do it, but it creates the gradient of doneness. We avoid that by doing a reverse sear where the meat is both cooked and seared at the same time by bringing the pan to heat in the closed grill (a more oven-like environment).  The meat both broil/bakes and sears, locking juices in, and only cooking it as much as you want it cooked. The reason those restaurants don't do a reverse sear is simply time. It's over an hour to make a steak. 

As always #HardwoodsOnly

All About That Baste: An Introductory Guide to Sauces, Brines, Seasonings, and Marinades PART 1 - SAUCE

So you're just wanting to throw something together, but you don't really know what goes well with what meat or really what you're doing outside of the TV room? This guide will try to explain the basics of brines, marinades, sauces, and seasonings.

So Easy A Caveman Can Do It: Barbecue Sauce Done Right


One Sauce to Rule Them All...

In the barbecue world there's some controversy over BBQ sauce. Some say it's cheaters masking poorly made food, others say it's what makes a barbecued meal great. Some say it's only good if you make it yourself, others say that they like the taste of Bullseye (hint, they're wrong).

Barbecue sauce is great for a number of simple things. Burgers can be good with it, but remember to grill up some mushrooms and onions to go with it. It's practically a requirement for ribs. It actually goes really well on hot dogs too. You can't make pulled pork without it, and it can compliment any number of meats if you've got the right sauce for the job.

I'll be frank, I'm biased in my opinions of barbecue sauce. I've been trying sauces from various places most of my life, I've dabbled in making it myself, and after years of searching, I finally came across the holy grail of all barbecue sauces in the summer of 2014.

OMG Barbecue is a company based out of Portland, OR. It was started by two local residents and produces, what I believe to be, the best tasting barbecue sauce man can make. I've tasted literally over a hundred different barbecue sauces, and OMG Habanero Honey Pineapple is by leaps and bounds the number one sauce on my list. Hell, it's so good that out of those hundred, it probably takes the top twenty spots. I absolutely hate the flavor of mustard. Can't stand it. Their sauces are so good that I actually like the flavor of their mustard line. It tastes so good I use it as a dipping sauce... for bread... but I rant a little much. Let's get into what makes it so amazing.

They don't water it down.
Ever notice how the cheap sauces you buy at the grocery store will just start spilling out of the bottle the moment you turn it upside down? It's because they're watered down to improve profits. Making you think you're buying more when really it's half water seems a bit like a scam to me. Good sauces will be thick. 

You can get it spicy, and it doesn't just taste like liquid smoke added to tomato sauce
As I said earlier, I'm pretty picky about my BBQ Sauce. If it doesn't have a flavor that goes beyond just some fake smoke flavoring and tomato sauce, my mouth is bored before I'm done swallowing. Barbecue sauce is usually meant to be used on food that is helped by having a lot of added flavor, you need your sauce to have some kick.

Lastly, It's different.
Say you have a bunch of friends over for burgers and you've got Bullseye or some junk like that out. It's boring. Nobody is going to be asking where you got it, most people will probably ignore that it's even there and just use ketchup since that's all it really is. If you want to impress people, get something they don't see every day. You won't regret it and they'll thank you for it.

Convinced to try it. Check out their website here.

#HardwoodsOnly

Where To Use Which Sauces

  • Burgers: for burgers you can really use any of them. Spicy sauces for those who like spicy, mild for those who don't like spice, or mustard if you prefer that. 
  • Ribs: In general I'd recommend a sweet sauce for ribs. Honey pineapple would be at the top of the list, powerful pepper following it. However, I've made delicious ribs with the habanero line as well. It all really boils down to preference. I love spicy, but most people prefer sweet when it comes to ribs. 
  • Chicken: Chicken can be made about a million different ways, so with this there really is no standard. Hot, sweet, even mustard sauces are all excellent for chicken. If you're doing a whole chicken though, I advise seasoning, not bbq sauce. 
  • Pork: This is one of the few meats in which the mustard sauce is arguably the best option. Habanero honey mustard or regular. It brings out a lot of flavor and compliments pork better than it does other meats. 
  • Red Meat: Apart from burgers, I'd say don't waste your barbecue sauce on red meat. NEVER put it on a high quality cut like a steak. Red meat usually needs to be prepared a certain way for the best flavor, and BBQ sauce isn't often it. 

#HardwoodsOnly